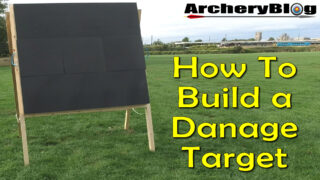
If you’ve never built a Danage archery target before you may want to check out my YouTube video on how to do it. There is certainly more than one way to build a Danage target, but don’t worry it’s not that difficult.
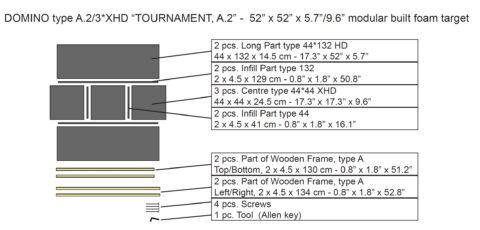
Most Danage targets have 3 square cubes running through the middle, which can be swapped around once the centres are shot out. The basic Danage has a double depth of XHD centre whilst the other centres either side of it are thinner and called HD squares. The more expensive version of the target comes with 3 XHD squares along the centre. You can even go pro and have all 9 XHD squares that make up the whole target.

The top and bottom pieces of the target are longer one-piece sections. In between these sections are long thin pieces of foam that hold the individual pieces together and also cover any holes that may appear in the joins of the squares.
Once you’ve built the foam parts it’s just a matter of building the wooden frame around the target to hold it all together. The frame we use has two blue handles each side which makes carrying and moving the target around a whole lot easier.

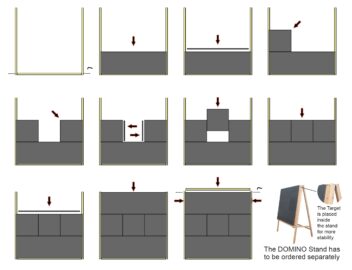
In the video we build the target flat on the floor, but the Danage instructions show building it upright and part building the frame first. It can be done that way but we find the frame bows and bends a little when trying to insert the foam pieces. But if we were working on the target and maintaining it and swapping out some squares we would take it apart this way to work on it.
After the overall frame is complete. We then build the outer target frame stand. Ours are sourced and built in the UK by Clickers Archery in Norwich. The inner frame then just slots into the outer frame. To make sure it stays in place we screw in a small ‘L’ shaped bracket to tie in both pieces. You can see this a lot easier in the YouTube video.
Finally we add another piece of horizontal wood behind the target in which we drill holes in to hold our red metal pegs. Then it’s just a matter of drilling two more holes to thread some rope through, which is our guy rope in order to hold the target still in windy conditions.
Watch How to Build a Danage Target on my YouTube channel, I think watching the video will make a lot more sense than trying to visualise it through my text.
Plus don’t forget to subscribe to my YouTube archery channel

